
Hello, I’m new to crochet. Can someone teach me how to make my edges straight? Is there a way for me to add a picture here so you can see what I’m doing wrong? Thanks
17 Likes
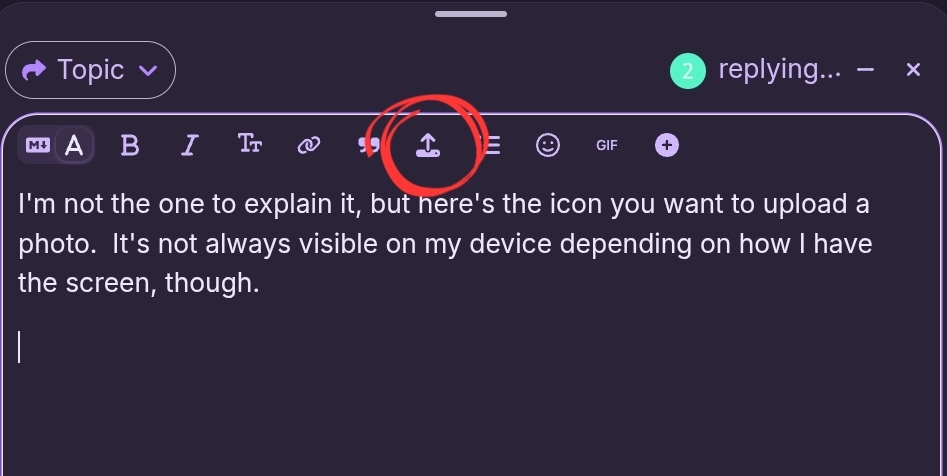
Hi. At the bottom right-hand side of your message box there is an upward-facing arrow. This will take you to either your camera to take a new photo, or to gallery to upload an existing photo (I’m using an Android phone).

4 Likes
Are you crocheting sc or dc? Firstly, make sure you are working every stitch in the row - counting stitches is a good way to check this. Second is to replace the chain at the start of the row with something more consistent. Chains can vary according to your tension, particularly at the start of a row, so replace a chain with a sc instead or, if doing a dc, a sc with a chain on top.
4 Likes
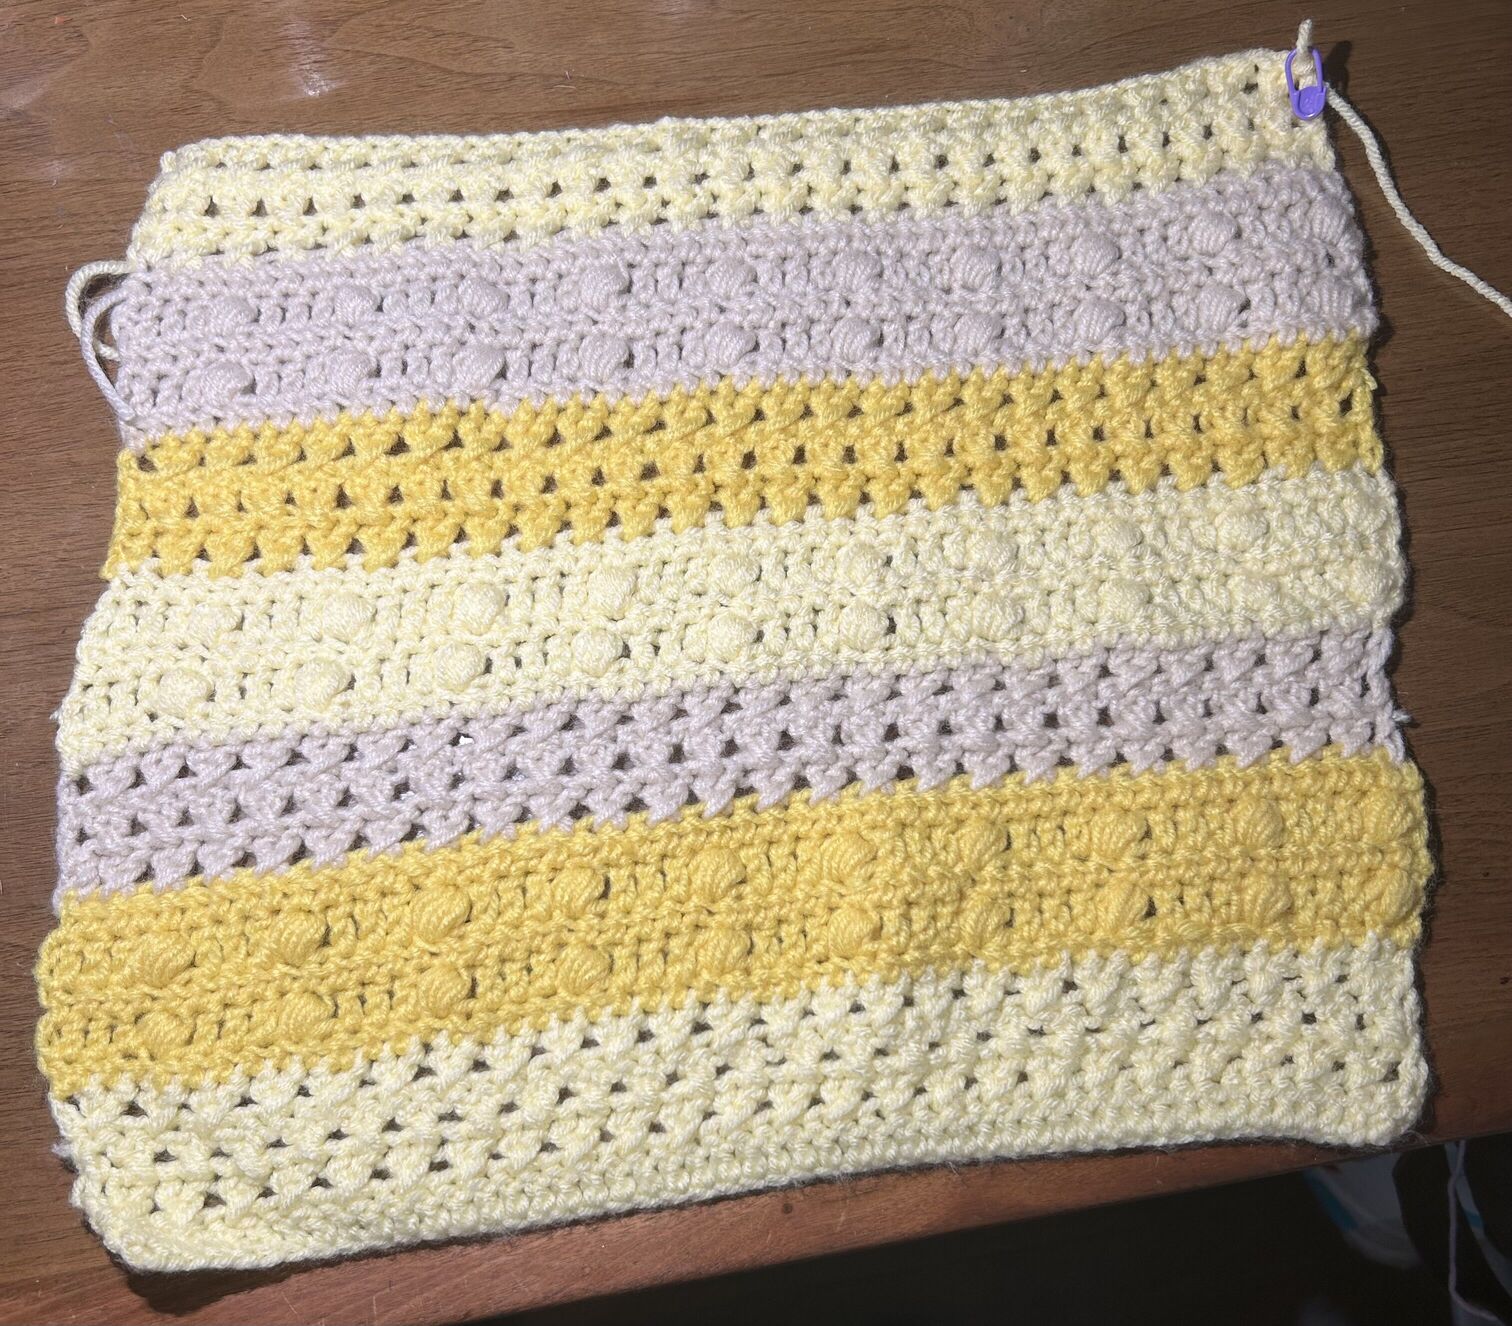
Thanks for showing me how to upload the picture. This is the rectangle that I can’t figure out how to make straight. What do you think I should do?
4 Likes
That’s tricky because the different kinds of stitches want to take up different widths. You’re going to have to work on your tension and crochet the denser rows more loosely. People often crochet a border to even things up also. Edges do tend to be a bit bumpy.
7 Likes
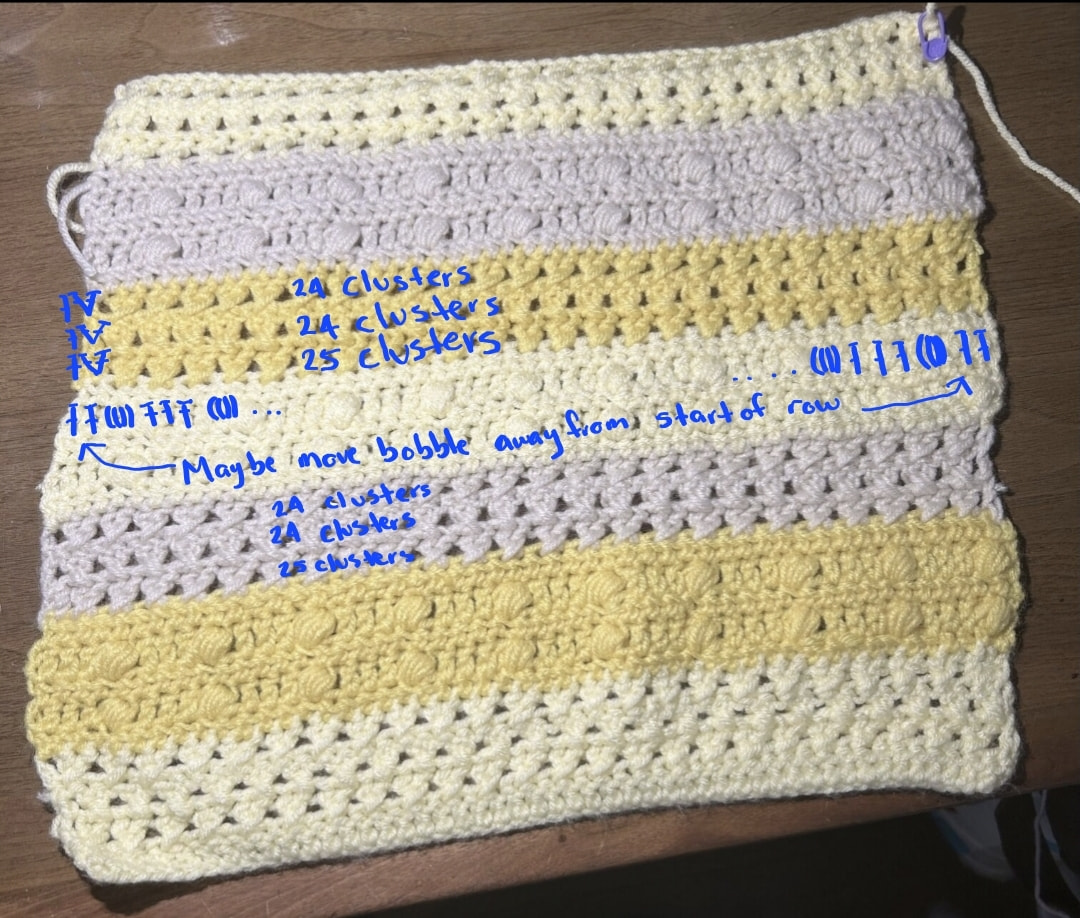
What I would do is mark the sts at the beginning and end of the row so that you know we’re the last st is! I used to do this a lot too because I couldn’t tell which st was the end one! I hope this helps!
5 Likes
i think you mightve added a couple inc somewhere
5 Likes
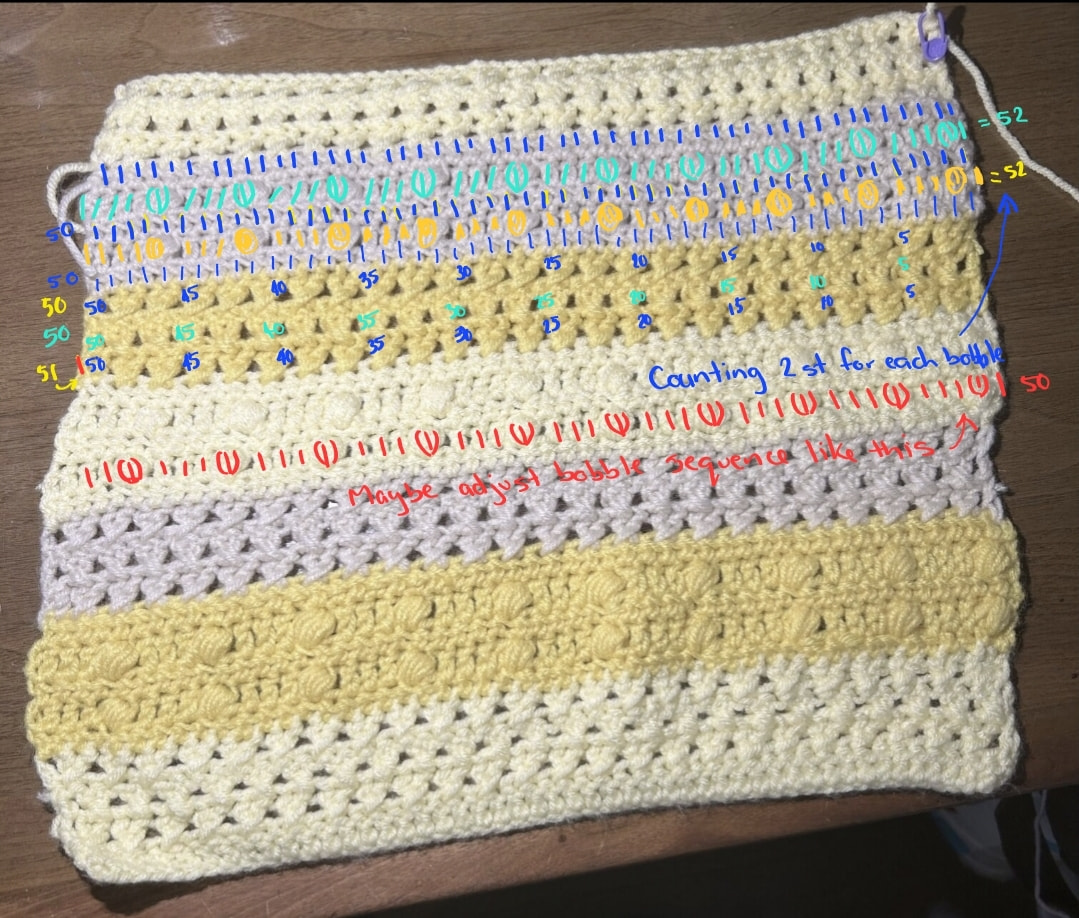
I’ve studied it a bit more, and I think your problem mostly lies in your bobble rows.
When I count the stitches, using two stitches per bobble, I get a total of 52 stitches for the row. However, the rest of the work seems to be 50 stitches across.
If you move the bobble away from the edge, that should help fix it. Do one dc before the bobble at the start and two dc at the end after last bobble (see the red).
See if that fixes the problem.
7 Likes
That’s so pretty. I love your colour choices. 
As long as your stitch count was exactly the same at the completion of each row you technically did nothing wrong.
One thing that may make it look a little wonky is the use of different stitch patterns throughout and this is also normal.
A couple of things you can do to straighten up the edges are:
- Border edging: You can single crochet around the edges of your project to give it a neater/straighter appearance.
- Blocking: To do this, soak the item in a sink of water and press it until the fabric is fully saturated. Empty the sink of water and press down on the crochet piece, until the excess water has been removed. Lay a clean dry towel on a table/bench. Place your crochet piece on top of the towel on one end. Wrap/roll the towel and your crochet into a sausage making sure to do this tightly and pressing the two together to squeeze out any excess water. Unwrap/roll your project and place it onto a blocking mat (alternatively a piece of foam, or another clean folded up towel etc). Gently pull your crochet piece into shape and place pins in each corner and along the sides to dry fully. Once your project is completely dry it should have a straighter appearance.
I would recommend doing both of these as you will get the best results. 
5 Likes
I had SO much trouble with that when I was new. My work kept getting wider and wider as i worked.
What helped me with that was when I heard that you should do the initial chaining on with a hook one size larger than the one you intend to use for the item you plan to crochet. Ever since I started doing that my work stopped growing and stayed the same width. Although technically, that does not seem to be necessary when working on granny squares or any crochet done in rounds.
OR another potential thing could be happening.
You may be adding or dropping stitches as you go. One thing that can help with that is to put a stitch marker at the start and the end of each row. That way you can tell exactly where you should be starting and ending.
Then just move them up as you move onto the next row. If you are dropping or adding stitches somewhere in the middle of the row (which can certainly happen when you’re new), learning not to do that comes with practice.
But If it’s mot a complex pattern, learning how to increase and decrease can be invaluable. If you can see the work is starting to get thinner, then you can intersperse a few increases along the next row, Conversely if it’s getting a bit wider you can add a few decreases in the next row.
It may not be perfect but it can help fix the issue. In the beginning just have fun. It’s really just a big learning experience. The more you crochet and the more things you learn how to do, the better you’ll naturally get at it.
2 Likes
Imo definitely start by chaining on with that hook that is one mm larger than the one you intend to use for the rest. Your work looks like it starts off growing from the start like mine used too, The chaining on looks too tight…
3 Likes
You could put an edge on it and use sc except for on the parts where it’s not as wide of use hdc
3 Likes
Thank you everyone for your suggestions !I’m going to try them and post a new picture here later. Thank you for your help I really appreciate it.
3 Likes
Looking forward to seeing the new picture.
3 Likes