Hii!! so im a wearable crocheter, ive been crocheting for about 4 years and every amigurmi stuffed animal ive made has turned out a little wonky, which has led to me just hating amigurimi in general. Im self taught and ive realized recently i may be doing a few things wrong and just haven’t been corrected yet because theres no one to correct me 
What i want to know is how people get the perfectly circular look on their stuffies, how their stitches are so neat, and how they crochet ‘right side out’ because for some reason i cant figure out how to do that
Basically: Any amigurmi crocheters with tips for me on any of these things (OR MORE) would be really appreciated thank youu!!!
11 Likes
Oooh noiice! Mm my tip is that instead of making a Mr (magic ring) you should chain 2 and go into the fist stitch and sc as much sc they ask you to:)
And to turn you’re project inside out, when you crochet using the Mr the more you crochted the shape will become like a “bowl” shape so then if you know like a pop it your just gonna make it so the inside of the bowl is out (that makes it more neater)
And also yarn under and not over;)
3 Likes
Depending on the yarn you are using , look up invisible decrease, and yarn under SC , I would not recommend plushie yarn as a first Ami , try Aran or dk ( worsted / light worsted )
Amigurumi needs to have tight stitches so the stuffing doesn’t show  .
.
Always use a smaller hook than suggested on the ball band .
Use stitch marker to mark that first stitch each round , count , count and count.
I’m off to bed in a minute , but if you need any help feel free to message me
4 Likes
Something I have discovered is to cork screw a paper clip so I can pin the arms and head with a quick screw through. I wrap a paperclip around a 10mm hook and its my go to for sewing things together in place
3 Likes
Here’s a tip to get the “right” side on the outside.
Don’t touch the tail you used to close the magic ring. As in weaving it in or pulling it through the other side of your piece.
Crochet according to the pattern until your piece starts to curl. Then flip it inside out. You are now seeing the “right” side facing out.
Remember, if the tail you used to close the magic ring is in the inside and not visible, the “right” side is facing outwards.
Another trick is to chain any amount (5-10) and sc in all the chains. The side facing you is the “right” side. So your amigurumi stitches should look like the ones on your swatch. You can fasten off and mark the side that is the “right” side (facing you) and save for future use.
The reason why I’m putting right in quotations is because you don’t necessarily need to flip your project onto the “right” side if you like the “wrong” side.
The important part is that you keep which side is facing outward consistent throughout each piece of your project.
3 Likes
-
Always use a hook 1 to 2 sizes smaller than the recommended size in the yarn band. This will ensure you don’t have those holes in your work where you can see the stuffing in the middle of your amigurumi. It will also give your work more structure - a firmer ‘fabric’ that is less likely to warp.
-
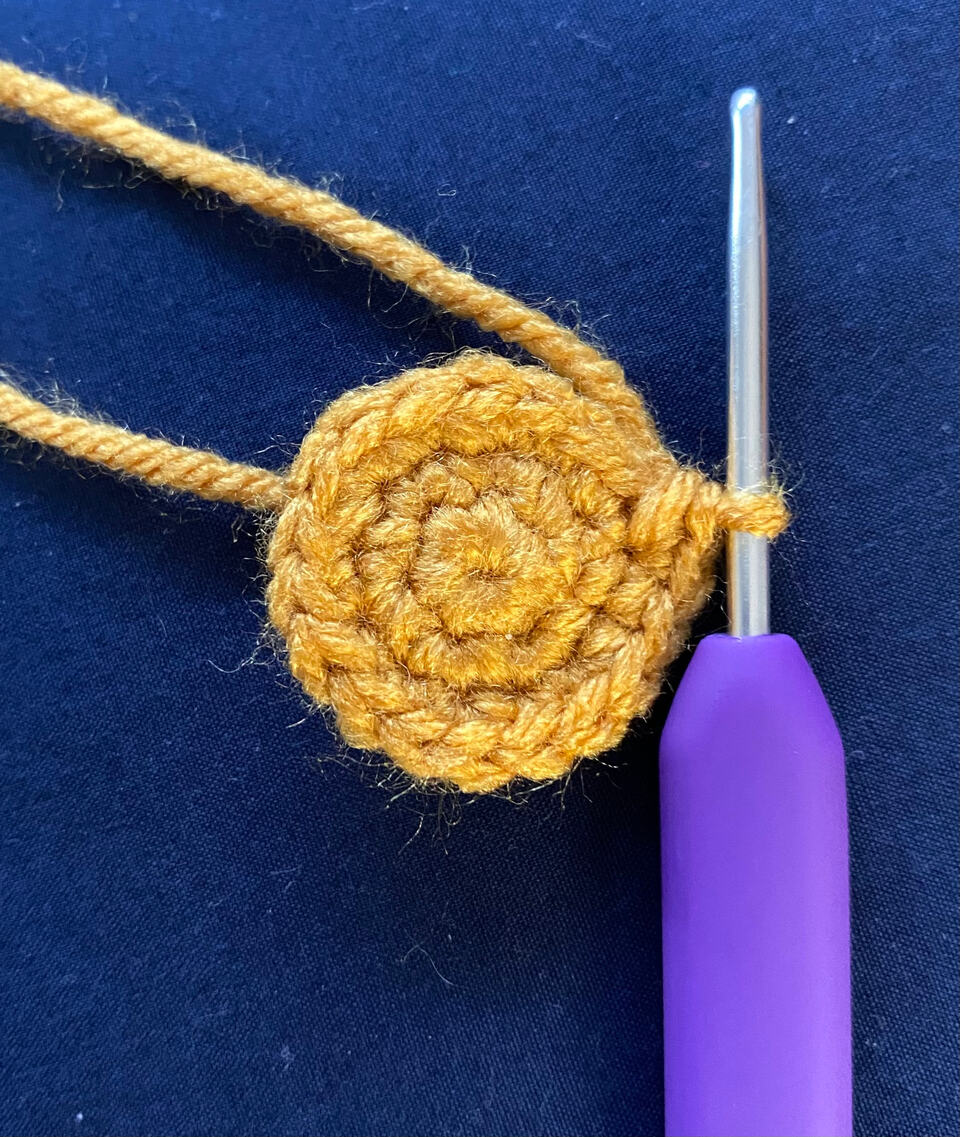
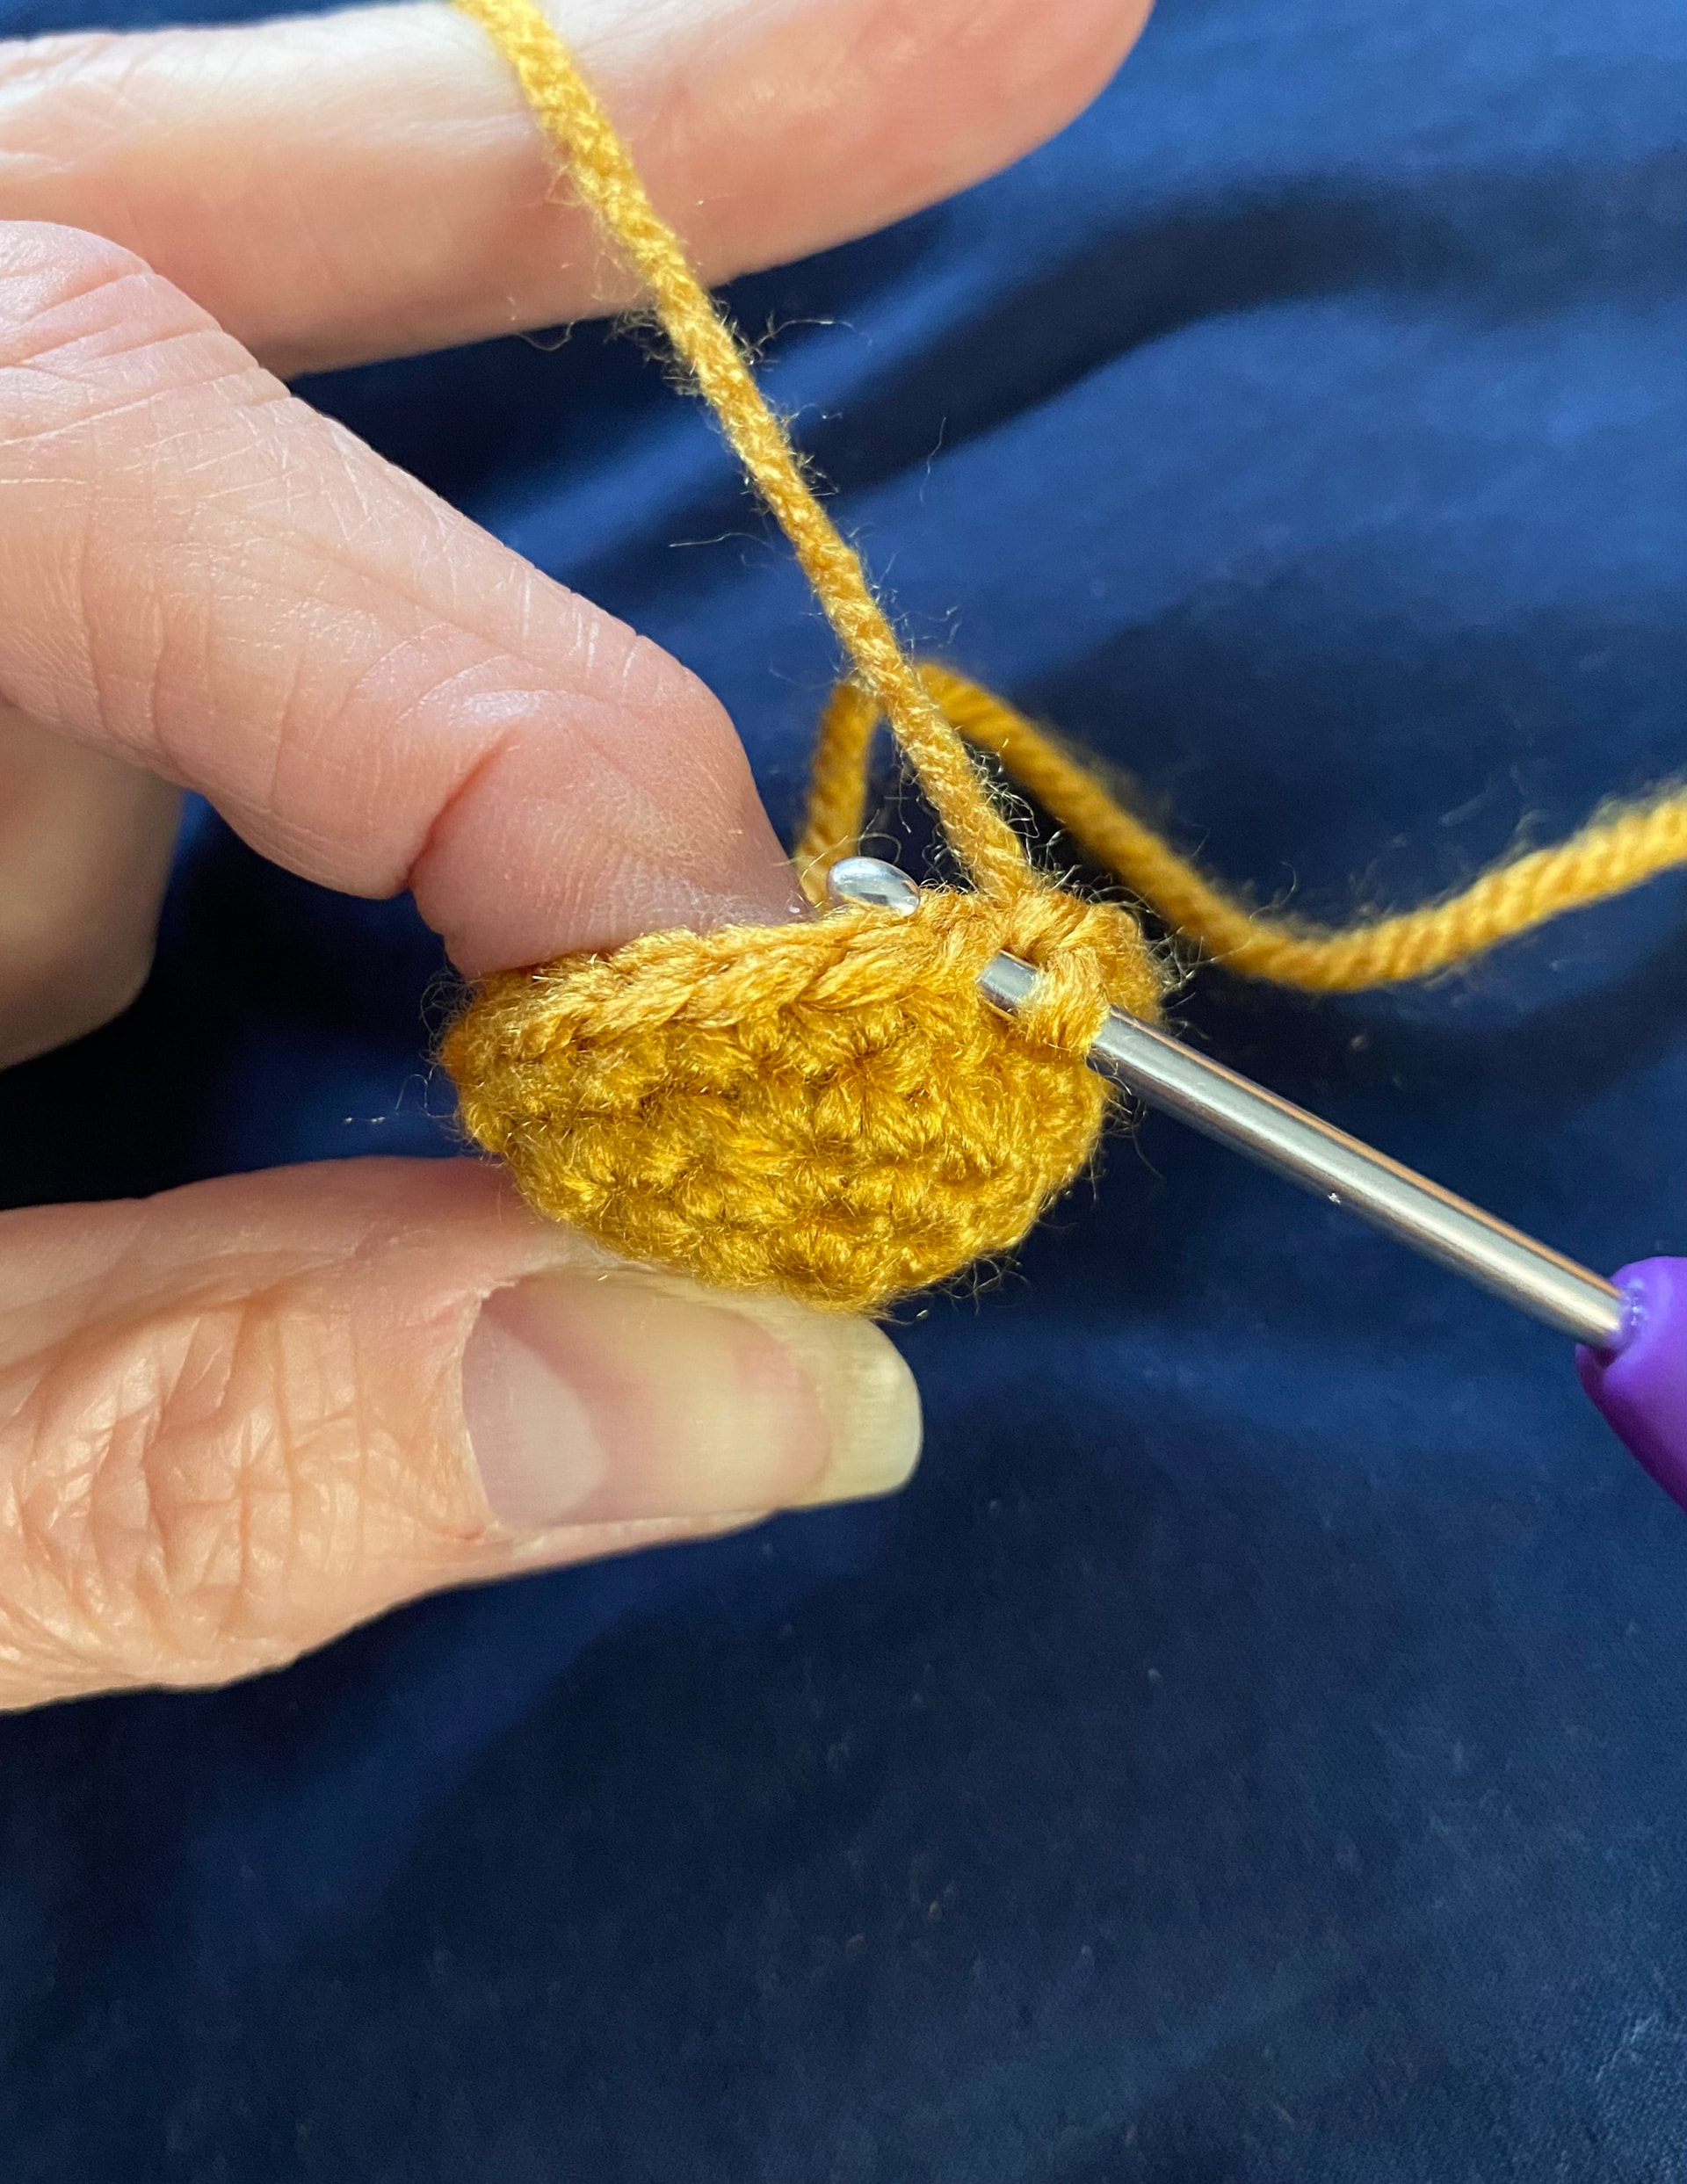
You should be able to identify the Right side of your work:
…and the Wrong side of your work:
-
You should always insert your hook from the Right side to the Wrong side, that is, from the outside of your work into the middle of your work as your work starts to curve.
-
When your work is starting to curl, press your work over your index finger or your middle finger so your work curves away from you, not towards you. This too will ensure the Right side is always on the outside.
-
Try to maintain a consistent tension. I find that I tighten my stitches ever so slightly every time I make a stitch by pulling the yarn wrapped around my pinky finger. This ensures a tight stitch each time.
-
Use a magic ring if you’re able to as this will ensure a tighter closure. If you struggle with the magic ring, make a slip knot and chain 2. Then work the first round into the first chain and tighten.
-
I use the yarn over method and find it works perfectly well for me.
5 Likes