This is how I do it:
- I make several prototypes until I get the design “right”.
- Make a new copy of the design, and either film or photograph it.
- If I film, I then have to edit and crop photos out of it.
- I use Google Docs and write out each step, inserting appropriate photos for each one.
- Check, check, check, check…for accuracy.
- Go to Ribblr and open split screen so I can see the Google doc and Ribblr at the same time.
- If I have a similar pattern (like a block or a dog coat), I copy that pattern and edit it with the new design.
- OR begin a new design, answering each of the questions.
- I have a Master list of each step, which I check off as I go along.
- Go line by line thru Ribblr, copy and paste from my Google doc. I check for accuracy in the original document as I build my Ribblr pattern,
- Publish.
- Come back the next day and check everything over, as sometimes I’m tired and make mistakes.
THEN:
13. Download the Google doc as a pdf.
14. Publish that pdf to my website, and any other place like Etsy or Ravelry.
15. Make advertising “memes” for my Facebook page and any crochet groups I’m a part of.
16. Advertise (where acceptable) to groups.
17. Pinterest pins made, and published.
18. Instagram posts made and published.
19. Make another cuppa coffee and go back to crocheting.
20. Whew!
Most important (I think): organize your desktop files as you go.
I make a main file, titled the name of the design.
Then subfiles I can access as I go along:
Design Advertising
Design Stock photos/video
Design BEST photos
Design Info
Design PATTERN pdf
If these files are in order to start with, everything runs quite smoothly.
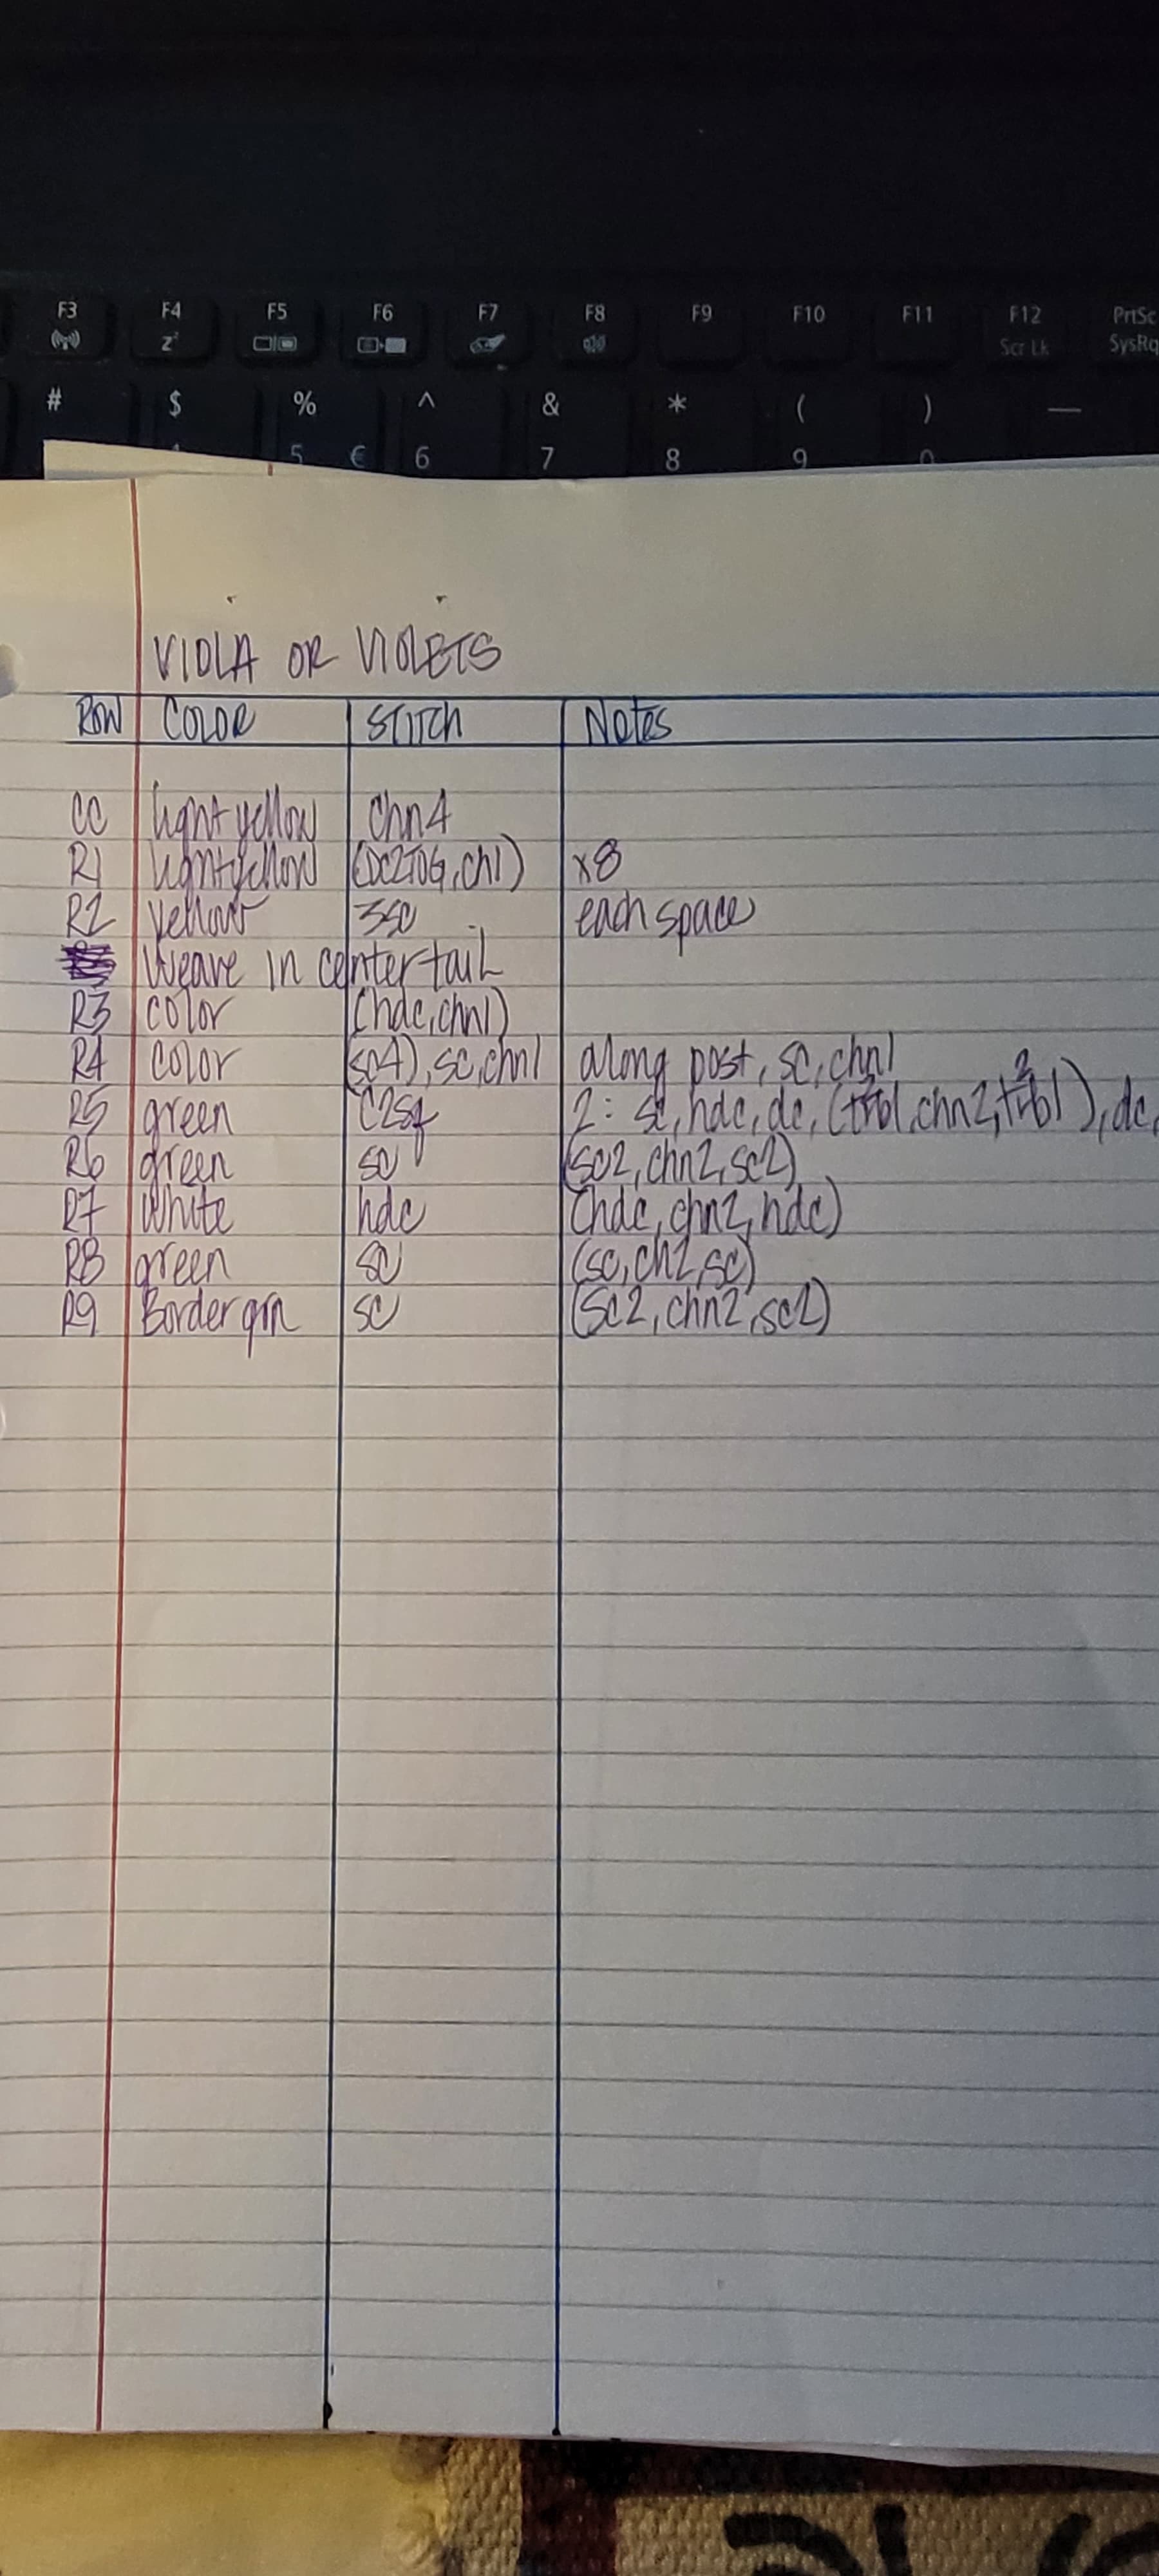
I also have a system for writing out patterns as I go along…
just lined note paper, but with this basic information to fill in:
Design Name
Yarn, etc
Then:
Row/Stitch/Amount/Notes
This setup really helps me, as I can focus on the design, and simply fill in the info as I go along.
When I then go to transfer that info into a pattern, I can read my various notes about “turning” or “tie off”, etc.
If there is a step that requires some explanation, I make a note of it, and then expand that one part.
I hope this makes sense…
Most of all:
go row by row,
give loads of info if needed (more is better than less)
and if you can: row count totals (that really helps the customer, if in the event I mistyped an instruction, they can still figure out what I meant by a row tally comparison.)
If I need to make a chart, I use Canva,
Works great and is very cheap.
Also: Canva is built for interfacing with Pinterest/YouTube/Facebook/Instagram, etc…so it makes any expansion of your crochet business much, much easier.
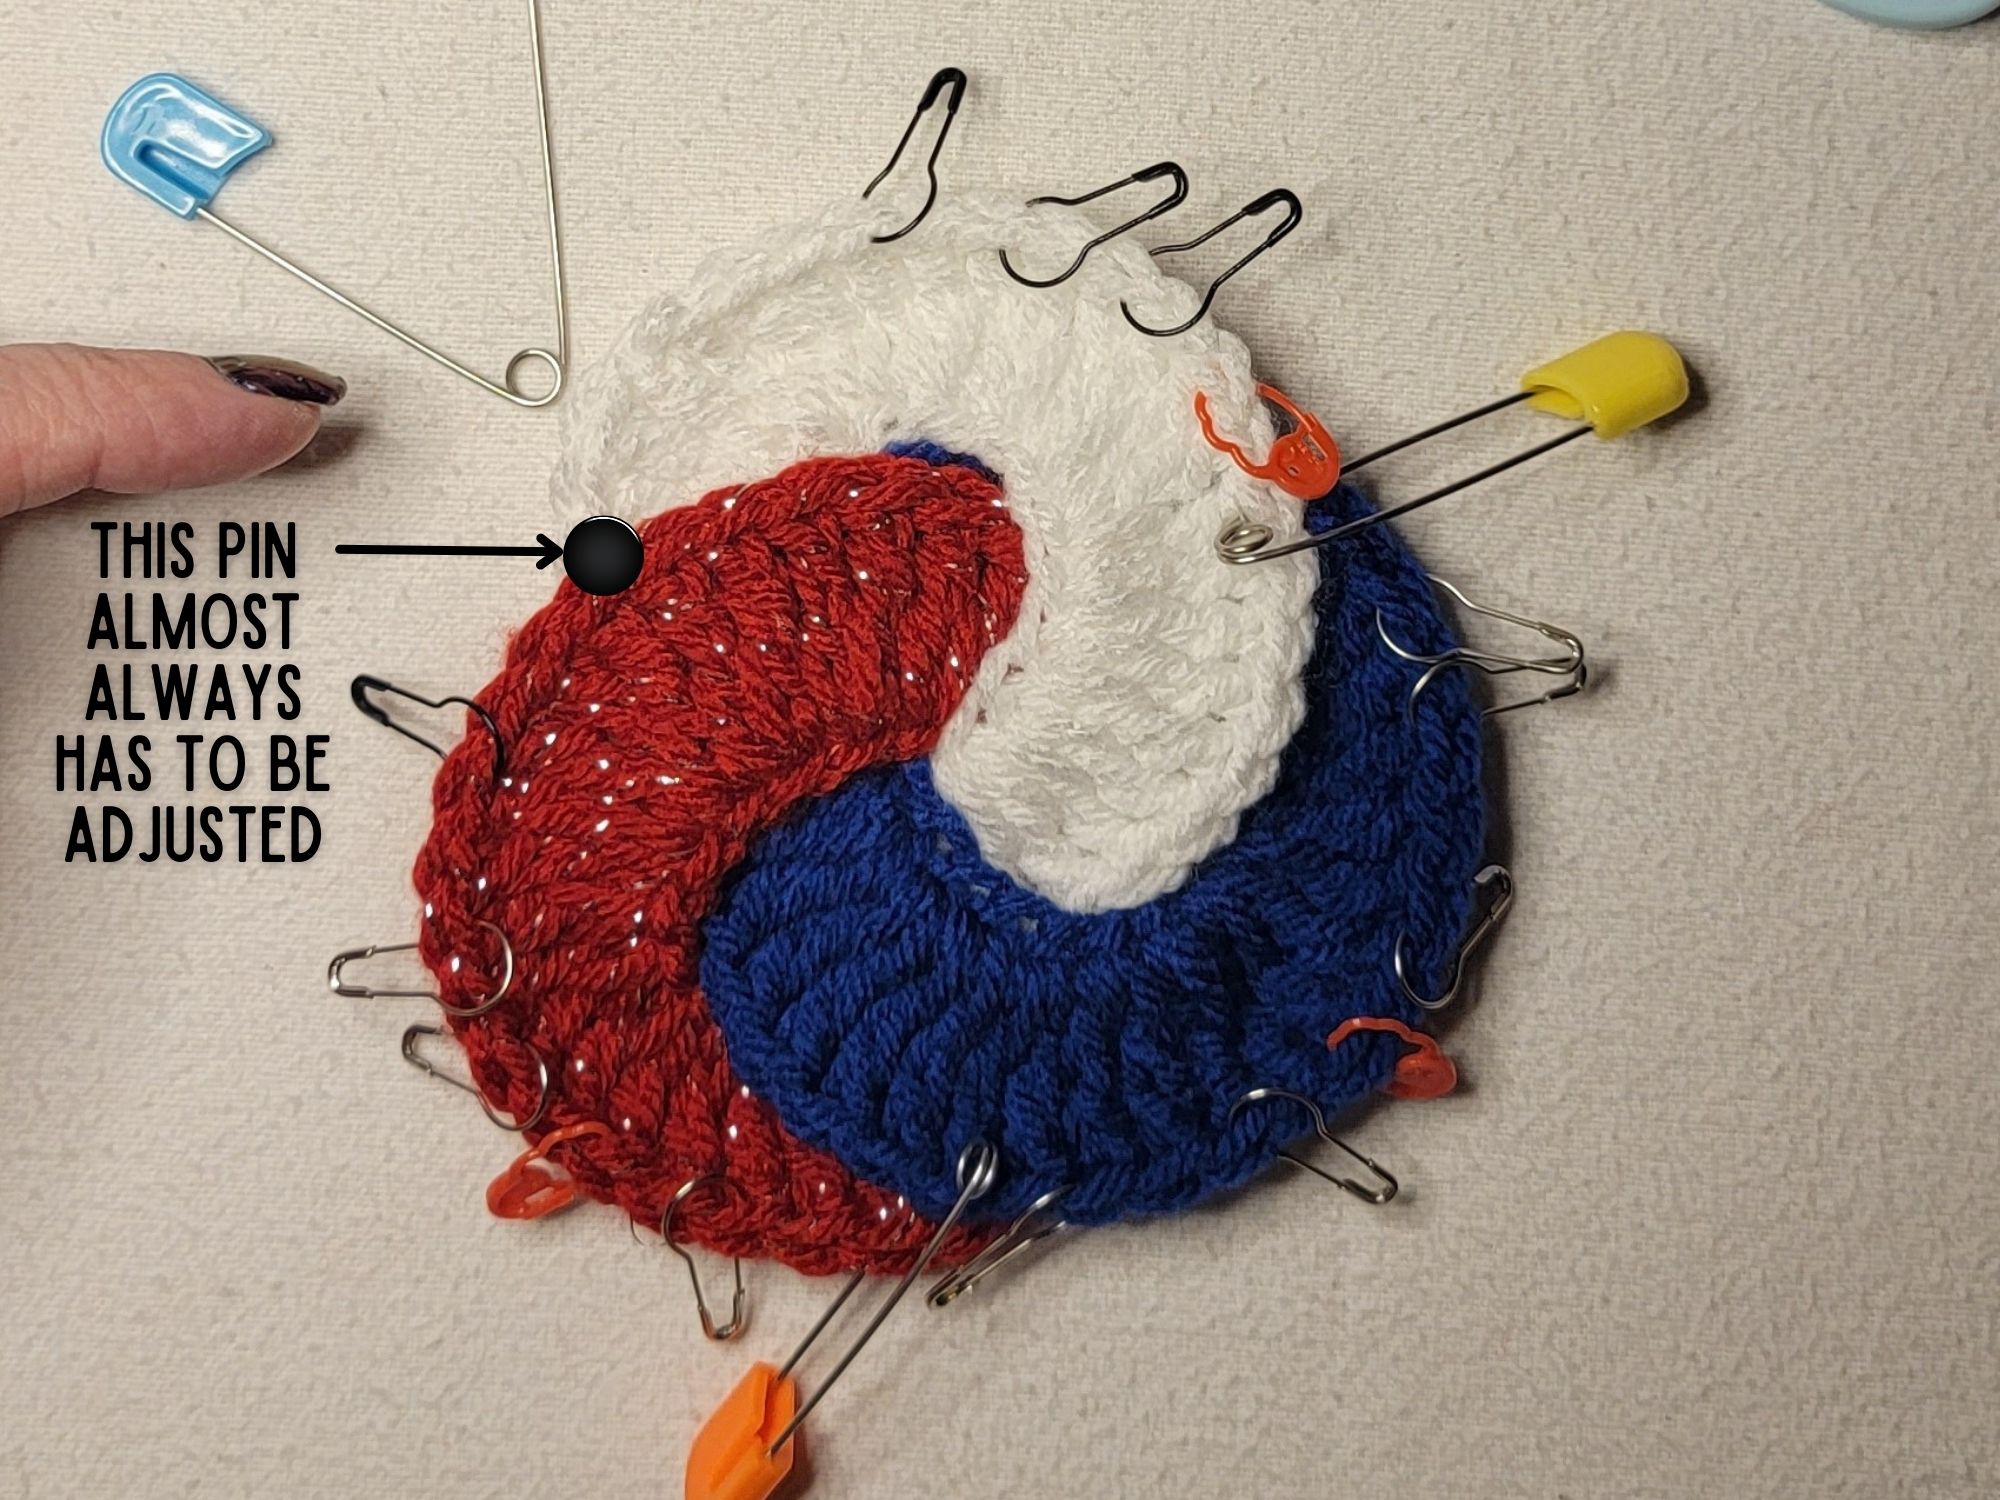
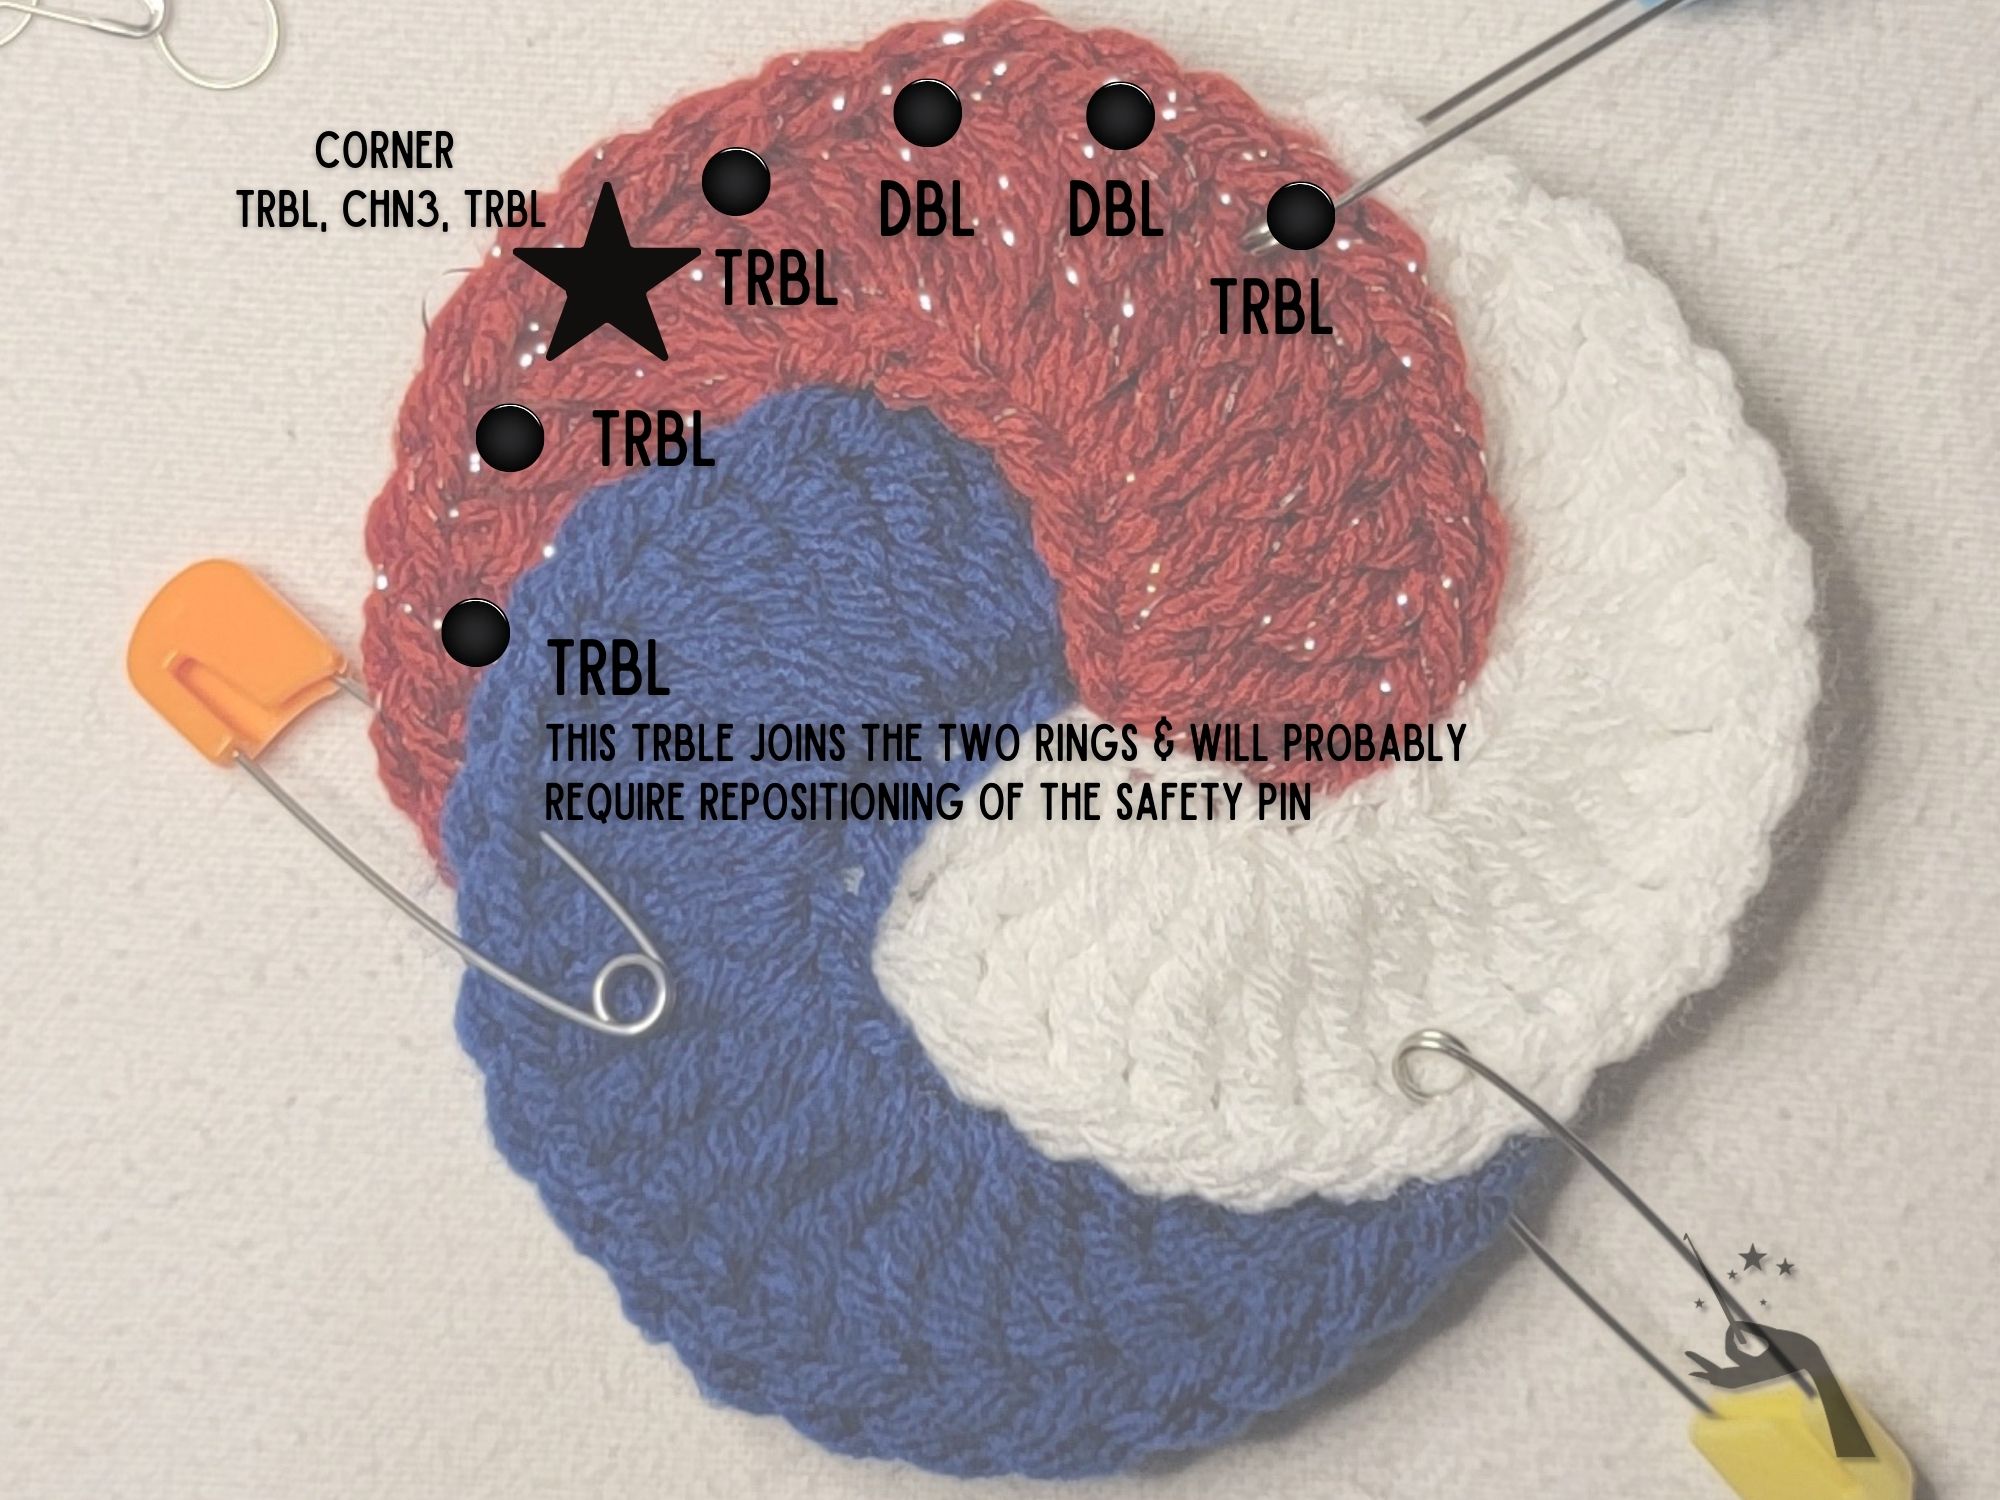
Attached: an example of a chart I made with Canva (these pop into a Ribblr pattern super easy! Just click on the file icon to add it.)
If you need to add more than one photo to explain your row instruction, just select a new line and add it there with a caption.
Hope this helps…
and Happy Stitchin’


 , the next square I’ve written a draft and some notes which is very helpful
