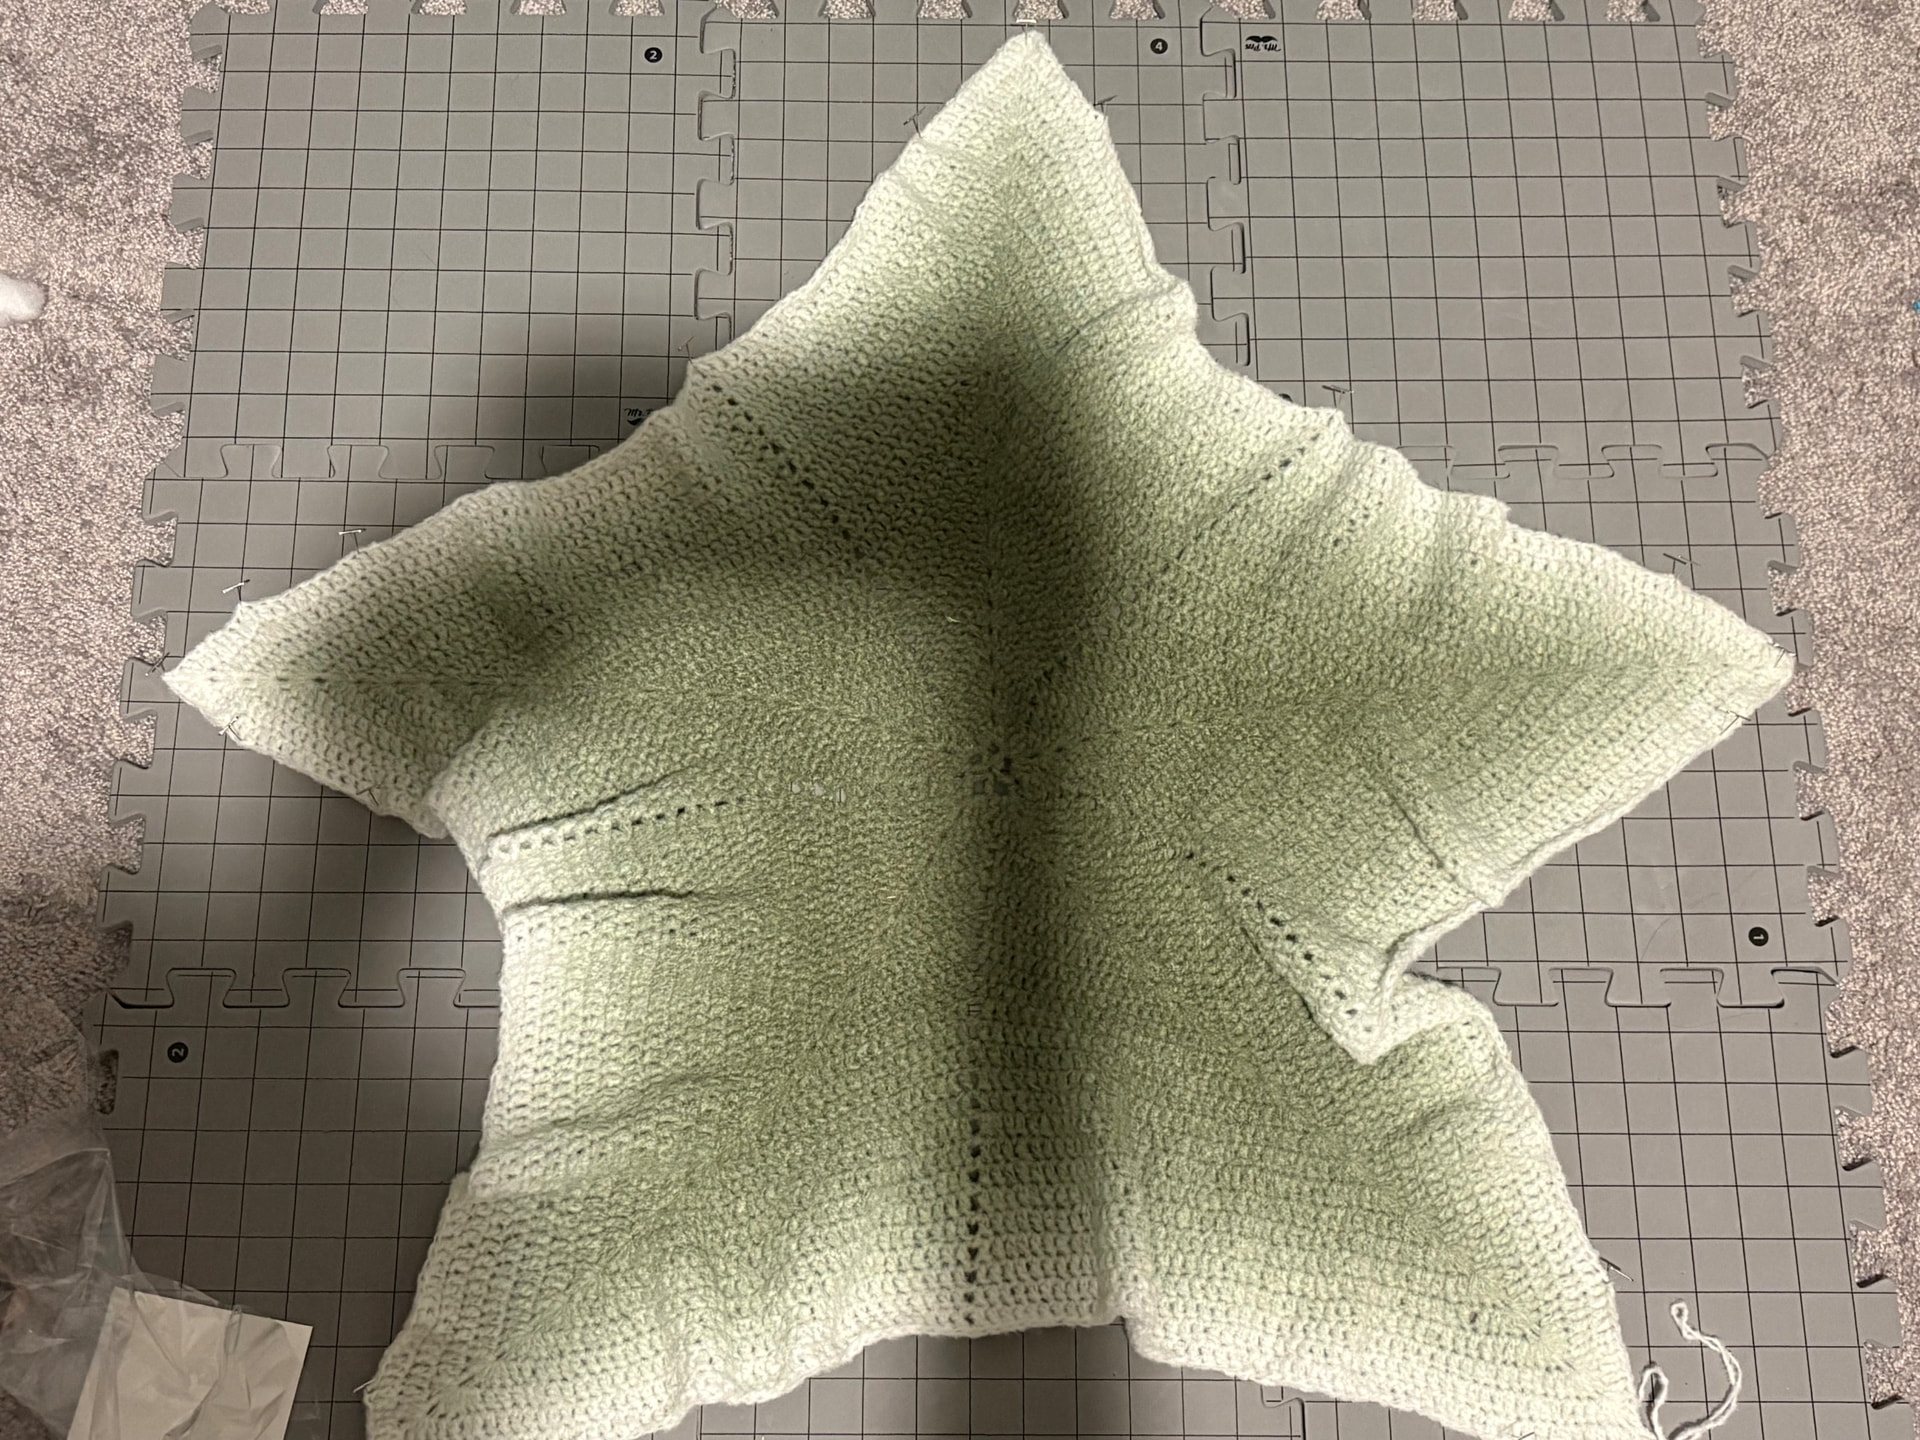
evenin ribblians, i’ve been working on this rug/blanket for maybe 6 months now (took a lot of breaks lol) and since im nearly done i decided to try and lay it out and pin it on my blocking board, just to see if i could make it lay flat (it was severely curling up)
however as you can see, it uh did not go well
i’m very new to blocking stuff (have only blocked one thing and it was a sweater), so maybe it’s an issue with how i pinned it, but i have no idea how i would even attempt to add more pins to flatten it, as the points are too short to stretch out any more
i think it might be an issue with both the pattern (too many or too little incs and decs) and my hook size (5 mm, i think it was too small)
i don’t really have a sentimental attachment to this, so i’m fine with starting over, but i like the yarn and i don’t think i could use it after frogging it, and plus i’ve spent a super long time on this
so, in short, is there any way i can fix this?
oh no, thats not good … um I think its the yarn hook or the pattern or the yarn. but over all it does still look nice, who cares about what people say as long as your happy, and maybe it won’t hurt if you try again?
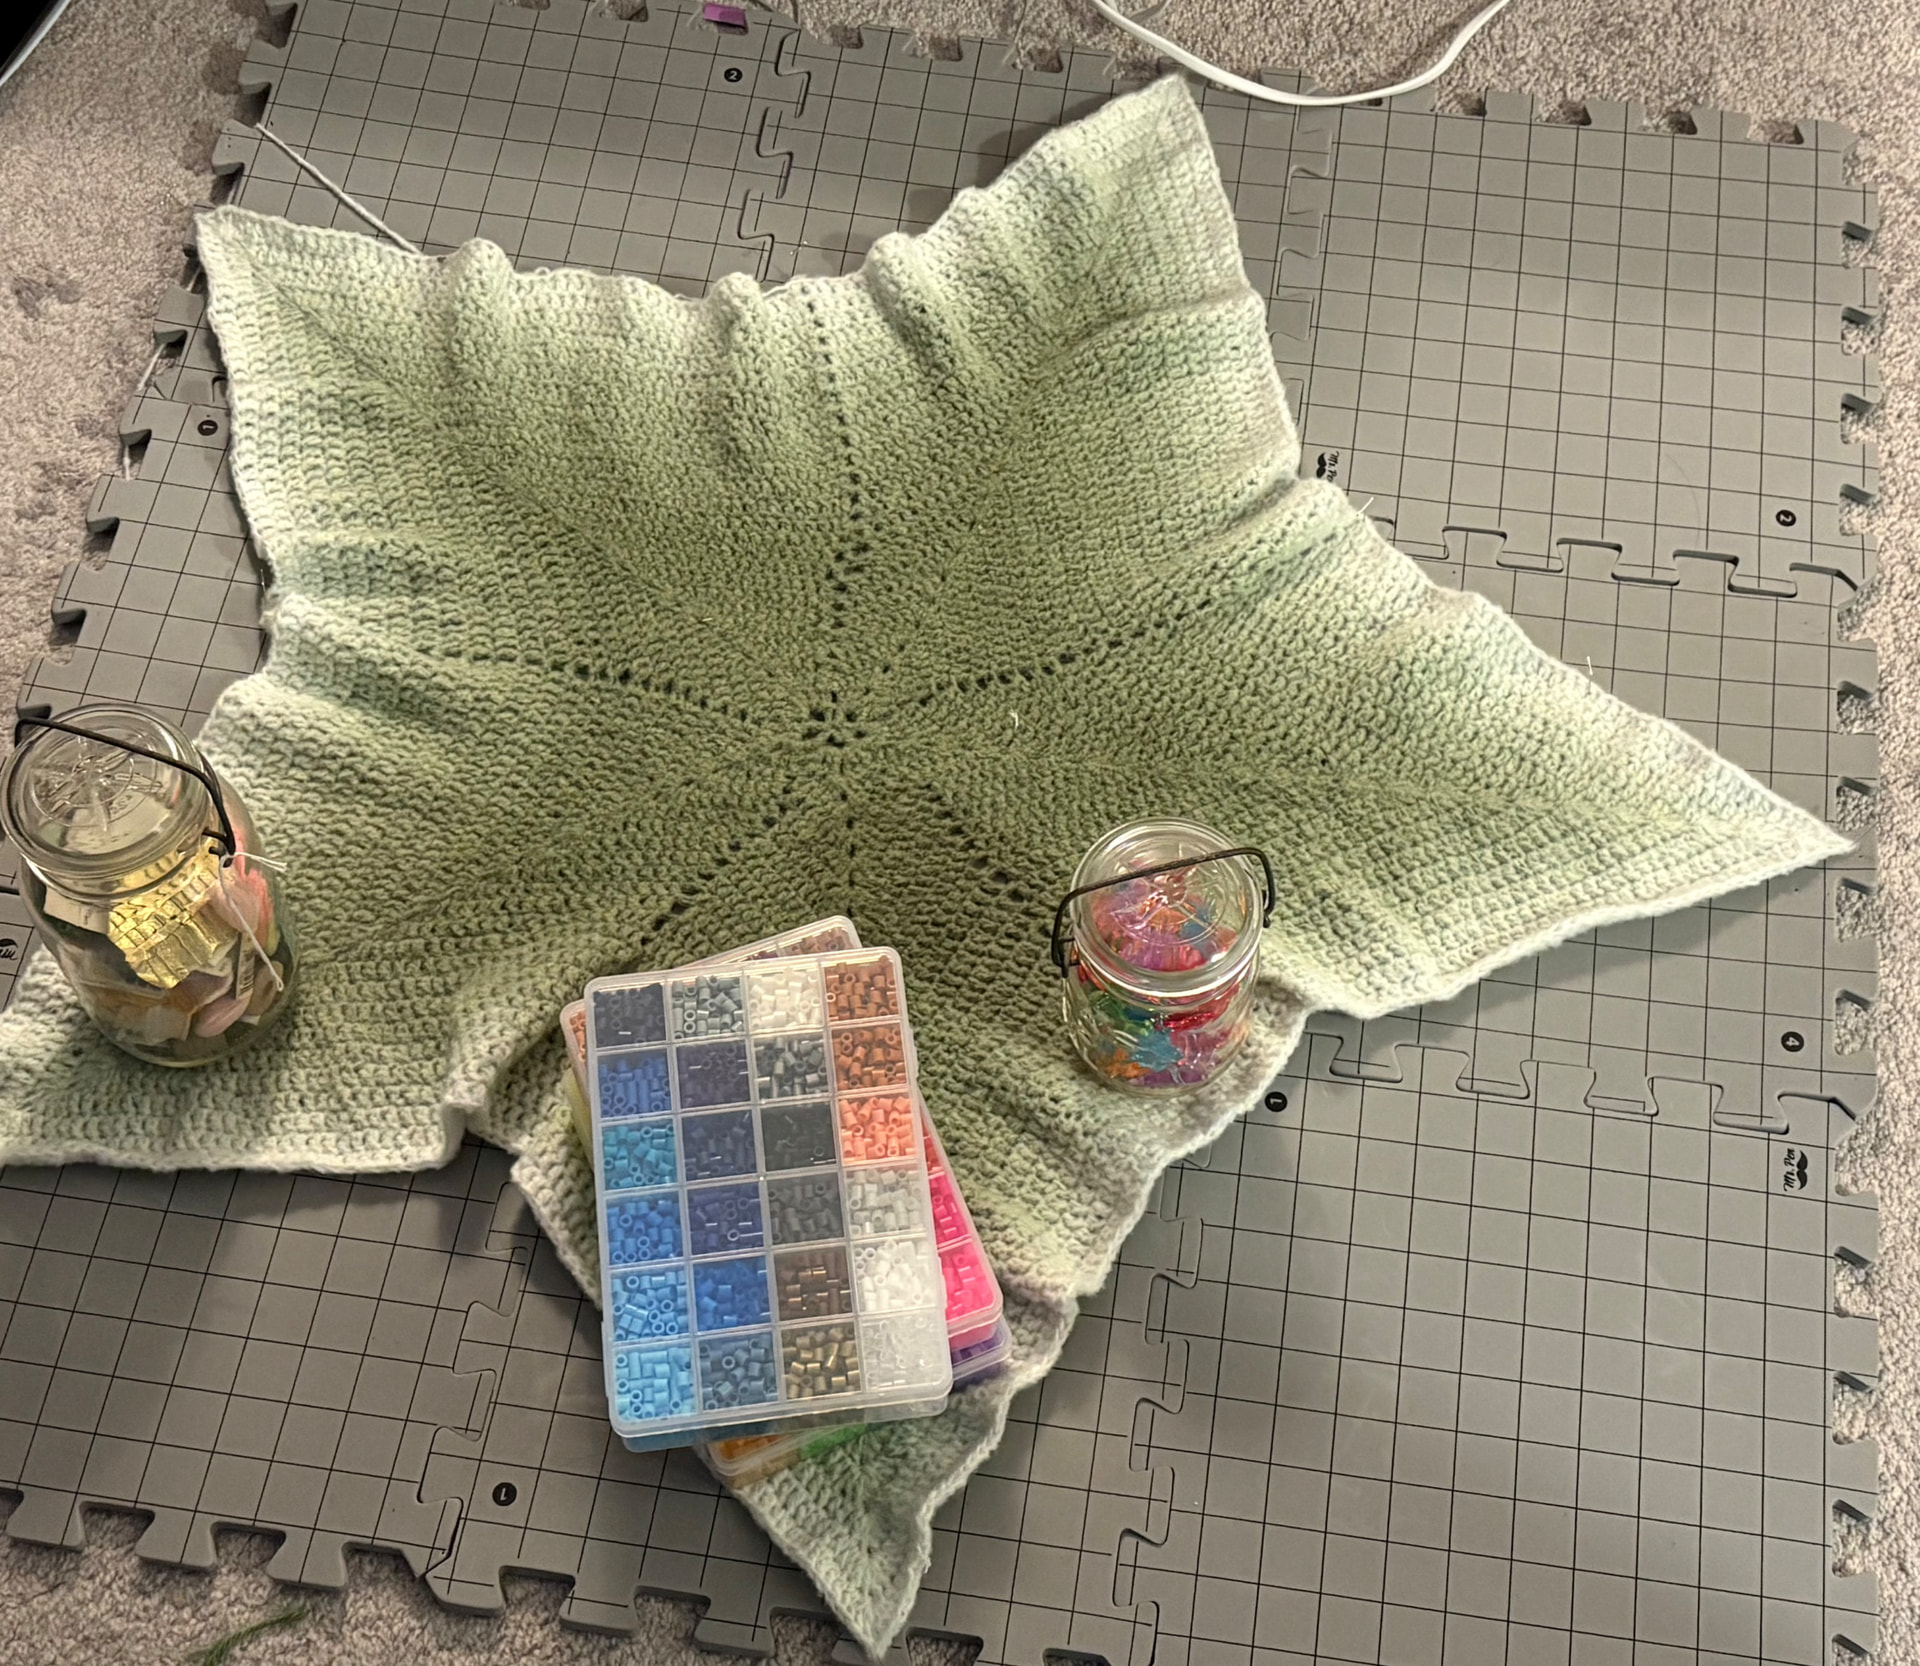
after checking the pattern i have discovered that i had been decreasing incorrectly for ehh maybe 20 or so of the rounds (aka the majority of the rug) (keep in mind i took a super long break from it, ig i just remembered the pattern wrong)
i mean at least i know why it looks like that now
update: still curling
i could probably get it to lay flat if i do a bit more steaming but i can’t be bothered, so i’m making a new rug (correctly this time)
gives me a use for some yarn cakes that have been sitting under my bed for a few months
Place your blanket in the laundry sink and cover it with water, allowing the water to penetrate the fibres of the blanket. Don’t agitate the blanket or water, just press the blanket to encourage the uptake of water. There’s no need to add detergent etc.
Drain the sink of water and with your hands, press the blanket to remove excess water. Don’t wring it out.
Get a bath sheet and lay it flat on a table/kitchen bench etc.
Take the blanket from the sink and place it flat on the bath sheet.
Roll the bath sheet and blanket together tightly and gradually, at the same time press and squeeze out the excess water remaining in the blanket.
Unroll the blanket and bath sheet.
Spread the blanket over your blocking mats, gently pulling it into shape. If the blocking mat isn’t big enough you can use folded towels etc to enlarge the surface as needed.
Pin the blanket to the blocking mat starting with a pin in the centre of the star and then in the pointed ends of the star
Gently pull into place the blanket sections between each of the points and place a pin in the centre.
Continue to gently push/pull the blanket edges into place and insert pins as required.
Once the blanket is dry, remove pins and voila your blanket has been blocked.
Alternatively, if you decide not to block the blanket, you can still use the yarn.
To get the kinks out of the yarn do the following:
As you unravel the yarn wrap it into hanks. For example: you can wrap it around the back of a chair or around a couple of handles on your bedroom/kitchen drawers.
Take some scrap yarn and tie it around the hanks in multiple places (in at least 4 places evenly spaced) to prevent the hanks from unwinding and becoming tangled and knotted.
Place the hanks into a sink and fill the sink with enough water to cover the hanks.
Soak the hanks in the water until they are drenched. Perhaps 15-30mins.
Empty the sink of water.
Gently squeeze the water out of the hanks.
Gently shake the hanks so that the yarn is not stuck together after squeezing out the water. We want air to be able to get into the centre of the hanks.
Hang the hanks by one end only (over the hook of a coat hanger for example) in either a shaded area outdoors or indoors if the weather is bad.
Once the yarn is dry most of the ‘kinks’ should have either disappeared or are much less noticeable.
Hi okay so first of all girl same but like if your using natural yarn then don’t do this unless it’s synthetic yarn but like I whould try using an iron or like a steam iron I have not yet tried this method yet but I did juts get a steam iron so I will be trying it out on my next project I need to block but also idk why you need to use synthetic yarn and not natural yarn it’s juts some smt some one online told me