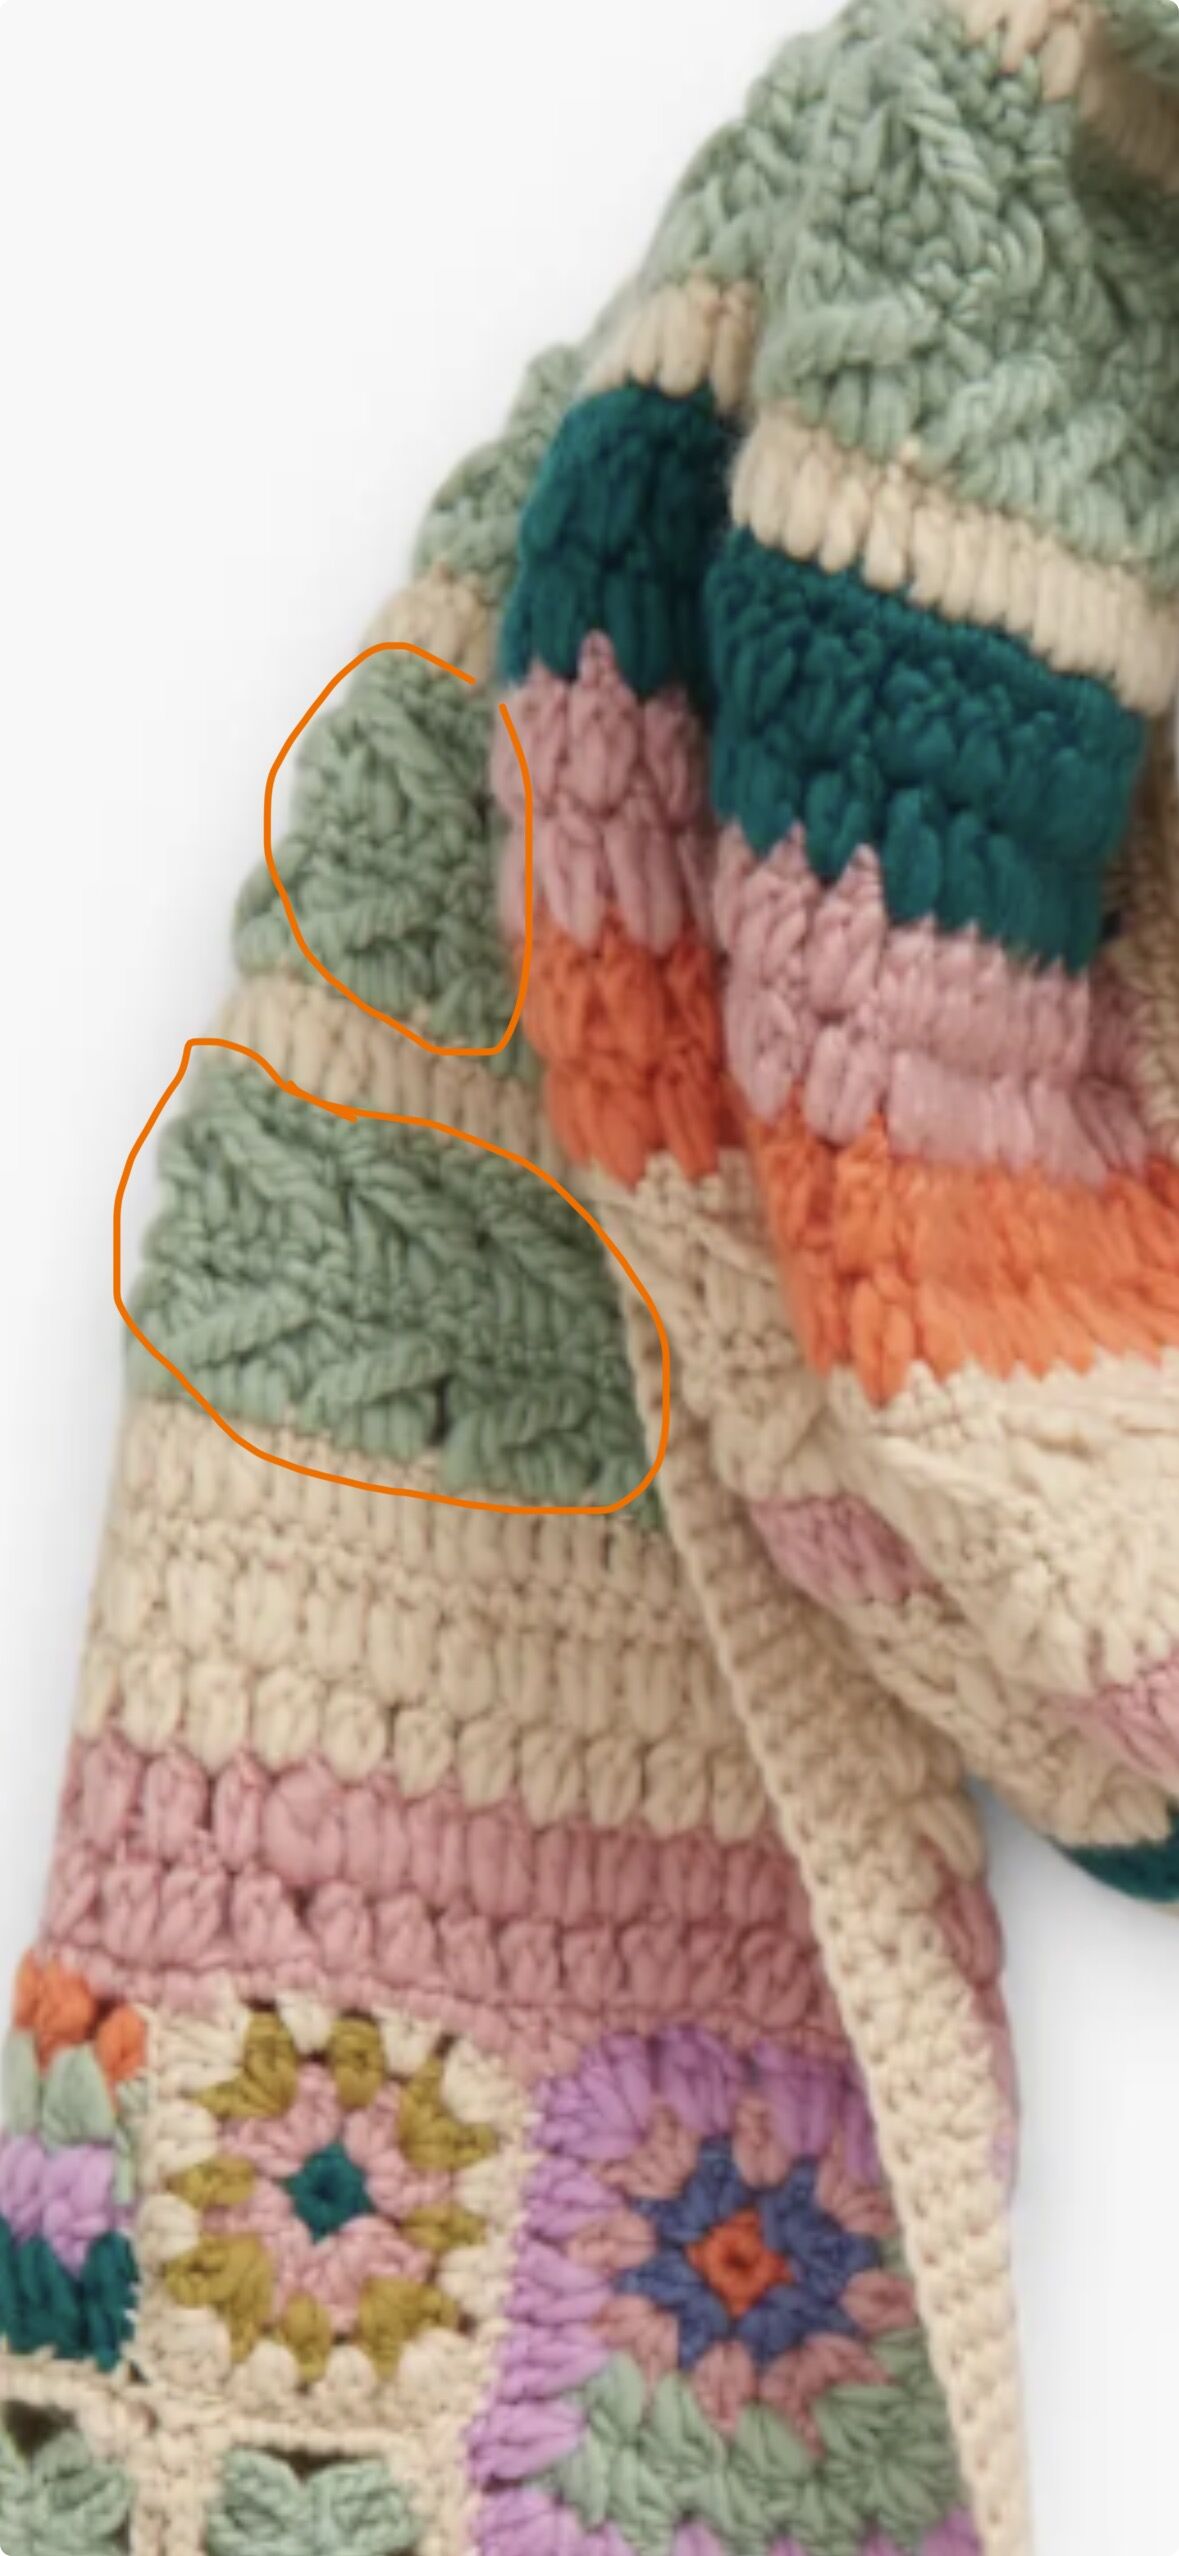
From ChatGPT: Looking specifically at the circled areas, the fabric appears to have short, elongated puff/cluster stitches worked in horizontal bands, with the raised stitches slightly overlapping the row beneath them. The result is that distinctive soft, chunky, almost braided-looking texture.
Here is the version I would try first to reproduce the photograph.
 Raised Rib / Overlapping Puff Stitch
US crochet terminology
You’ll need
- Worsted-weight yarn
- 5 mm (H-8) hook
- Chain a multiple of 3 + 1
Special stitch — Long Puff (LP)
- Yarn over.
- Insert hook into the indicated stitch.
- Pull up a loop about ½ inch high.
- Repeat 3 more times in the same stitch.
- You should have several long loops on your hook.
- Yarn over and pull through all the loops.
- Chain 1 to secure the puff.
That extra chain is important—it gives the puff the little horizontal separation visible in your photograph.
Row 1
Sc in 2nd chain from hook and in every chain across.
Chain 1, turn.
Row 2 — First raised band
Sc in first stitch.
Long Puff in next stitch, sc in next 2 stitches.
Repeat from * across.
Sc in the final stitch.
Chain 1, turn.
Row 3 — Recessed row
Sc across, but when you reach a puff, work your sc into the chain-1 space immediately above/between the puff and the next stitch, rather than into the top of the puff itself.
This is what helps push the puff forward.
Chain 1, turn.
Row 4 — Second raised band
Sc in first 2 stitches.
Long Puff in next stitch, sc in next 2 stitches.
Repeat across.
Sc in the last stitch.
Chain 1, turn.
Row 5
Sc across, again working into the spaces between the raised stitches where possible.
Chain 1, turn.
Row 6
Repeat Row 2.
Row 7
Repeat Row 3.
Row 8
Repeat Row 4.
Continue alternating the raised bands this way.
The key to getting the photograph’s look
The height of the puff is actually more important than the exact stitch count.
For the pictured texture, don’t make little round puffs. Make them long and loose:
Too short:
● ● ● ●
What we’re trying to achieve:
==== ==== ====
The loops should be pulled up enough that each puff becomes an elongated horizontal/diagonal bundle, rather than a ball.
I’d also use a slightly smaller hook than you normally would for the yarn. That makes the surrounding fabric compact while allowing the puff stitches to stand prominently on the surface.
One adjustment I think will make it even closer
In your photograph, the raised sections appear to lean/overlap, rather than sitting in perfectly straight columns. So after making the first 2–3 rows, I’d shift the puff placement by one stitch:
Rows 2, 6, 10:
P . . P . . P . .
Rows 4, 8, 12:
. P . . P . . P .
That staggered placement should produce the irregular, interlocking texture seen in your circled section.
I would start with a 15–20 stitch swatch before making the whole project. The photograph is somewhat out of focus, so I wouldn’t claim this is the original designer’s exact stitch, but this is the construction I’d use to get visually very close to the circled fabric.